I’ve been asked many times over the past year or two how to get started making YouTube videos. What type of equipment do I use, etc. What I’m going to cover in this article is what you can use to get started producing professional looking videos on a relatively small budget. I have a full list of equipment inside, so let’s get started…
Video Camera
On the camera, if it’s something where your “subject” will be at a relatively fixed position from the camera, a DSLR camera will be perfect and can work as both your picture camera as well as your video camera. If you’re doing something like product reviews, a camcorder is a touch better as its focusing mechanism is less intrusive (smoother focus).
Canon T3i
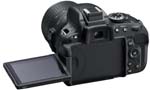
Canon T3i
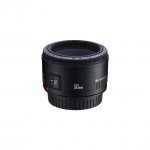
Canon 50mm f1.8 Prime
A prime 50mm lens for the Canon
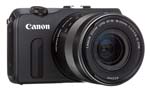
Canon EOS-M
Canon EOS-M
NOTE: There are a couple of options on that particular page – I chose the one with the 18-55mm lens – reason being that it gives you more flexibility – the other option is for the fixed 22mm lens
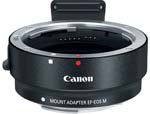
Canon EOS Lens Adapter
EOS-M Lens Adapter
A couple of notes on these two cameras. The t3i is more of a prosumer type of shooter meaning it has dedicated buttons, and a full-featured type approach that most photographers will be accustomed to. The EOS-M being a smaller camera trades buttons for menu-selections. If you’re just looking to shoot video, that won’t matter all that much – if you’re wanting to get into photography at some point it time, it might be better to go with the t3i – one other thing to note in favor of the t3i is the articulating screen which makes it easy for you to see what you have framed in your shot from your camera – this is real nice when you’re going to be doing the setup, recording, etc. all on your own.
Another Option for a Video Recorder on the Cheap
I’m only recommending this if you have an iPhone 4s or later, or potentially the original iPad Retina or later. Why no Android devices??? Software…so, this is why the Apple offerings are suggested, and this is only suggested if you have sufficient lighting – see at the bottom of this article for recommendations.
FiLMiC Pro iOS App
FiLMic Pro
Here’s the reason I recommend this setup – no, you can’t produce the same exact quality as the other two cameras mentioned, but you can do pretty darn good and considering you don’t have to spend more than $5 (assuming you already have the iPhone/iPad) and you can be up and running. FiLMiC Pro allows you to lock focus and lock metering for your lighting. For this reason alone, you can produce consistent results where your video won’t constantly be “searching” for focus, or changing your lighting. With this setup, you can actually produce shockingly good results, and if you’re just doing something for a video blog or the like, this is an excellent option. If you’re trying to shoot short movies, this may not be ideal, but for many situations this will work just fine. You’ll definitely want to invest in a tripod an a mount to make this work out.
Audio Recorder
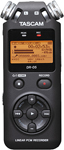
Tascam DR-05
Tascam DR-05
Lavalier Microphone
Here’s the two products….
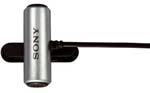
Sony ECM CS3
Sony ECM CS3 – Stereo Lavalier Mic
I prefer the sound on this lavalier over the ATR-3350 but it has a rather short cable. If you get this microphone you may want to invest in an extension cord – also, this one does not require a battery.
http://www.amazon.com/dp/
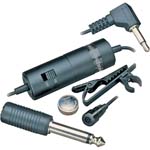
Audio-Technica ATR-3350~~
Audio Technica ATR-3350 – Omnidirectional Lavalier Mic
This is a decent budget lavalier microphone. Where it shines compared to the CS3 above is it’s rather long 20′ cable so it’s easy to run a distance to your audio recorder. However, the sound quality on the CS3 is better in my opinion and as a downside, the 3350 requires a battery – but the battery does last a very long time. You just need to remember to turn it off!
http://www.amazon.com/dp/
Tripod for Video
Combo Tripod and Head
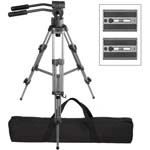
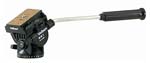
Ravelli Video Tripod
Ravelli AVTP Professional 75mm Camera Tripod with Fluid Head – great tripod with nice head for smooth video panning/tilting
http://www.amazon.com/dp/B00139W0XM/?tag=untinc-20
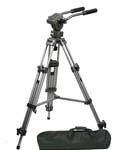
ePhoto Video Tripod
ePhoto Professional Heavy Duty 75mm Tripod with Fluid Head – another great tripod that is sturdy with a great head for smooth video panning/tilting
http://www.amazon.com/dp/B0036NSY5Q/?tag=untinc-20
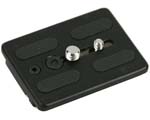
Flat Camera Mounting Plate
Note about both the tripods/heads above -notice the plate for mounting your camera to – they are completely FLAT – I never knew how big of a deal this was until I purchased heads that didn’t have flat plates and my camera would wobble slightly when moving the head. Make sure whatever you look at has plates that can be released from the head – I believe this design was originally created by Manfrotto and has been copied many times over. You can see what I’m talking about here:
Flat, locking camera mounting plate
http://www.amazon.com/dp/B00BUBDQR2/?tag=untinc-20
Tripod Head Only
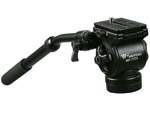
Weifeng 717AH Fluid Head
http://www.amazon.com/dp/B003HNS6S0/?tag=untinc-20
Velbon 368 Fluid Head
http://www.amazon.com/dp/B000Y25ZFY/?tag=untinc-20
Video Editing Software
Video Editing Software for Windows
Sony Vegas Movie Studio Editions Comparison Matrix
http://www.
Sony Vegas Movie Studio Platinum
Sony Vegas Movie Studio Platinum
For me personally, I’d probably go with Movie Studio Platinum for the price ($60 on Amazon at the time of this writing). Professional level editing options in a consumer priced piece of software.
http://www.amazon.com/dp/

Sony Vegas Movie Studio Suite 13
Sony Vegas Movie Studio Suite
http://www.amazon.com/dp/
Video Editing Software for a Mac
On Mac you have two choices…to get started out on the ultra-cheap, it’s hard to beat iMovie – it’ll do most anything basic and it’s dirt cheap – in most cases it was free with your Mac.

iMovie 11
iMovie – typically free with your Mac – $14.99 if it didn’t
If you’re just getting started and you already have a Mac, this is where you should start. This is a simple and effective piece of software that will make throwing your videos together a breeze.
https://itunes.apple.com/us/
Final Cut Pro X
Final Cut Pro X – $300
The one I personally prefer, but this is getting into professional level editing which you won’t need starting off, is Final Cut Pro X. I love this software. It keeps getting better and better – Apple has constantly upgraded it and I’ve never had to pay an extra penny in the two years since I bought it.
https://itunes.apple.com/us/
Audio Editing Software

Audacity
Audacity
GarageBand
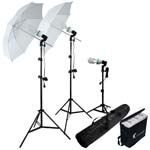
Limo Studio Umbrella Lights
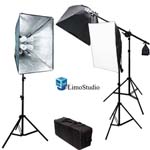
Limo Studio Softbox Lights
http://www.amazon.com/dp/B008GWH7VE/?tag=untinc-20
Putting it All Together
| High End Budget Video System | ||
|---|---|---|
| Product | Price | Link |
| Camera: Canon t3i | $550 | Go |
| Audio Recorder: Tascam DR-05 | $100 | Go |
| Microphone: Sony ECM CS3 | $20 | Go |
| Tripod/Head: Ravelli Pro | $130 | Go |
| Editing Software: Vegas Platinum | $60 | Go |
| Lighting: Limo Studio Softbox Lights | $120 | Go |
| Total: | $980 | |
That’s it. Just as a heads up – all the links above are affiliate links so if you do buy, please use them so I get some credit for it – the price is the same whether you use my links or go straight to Amazon and search for everything yourself. Only difference is Amazon would keep all the money rather than me getting a small cut for putting this together for you.